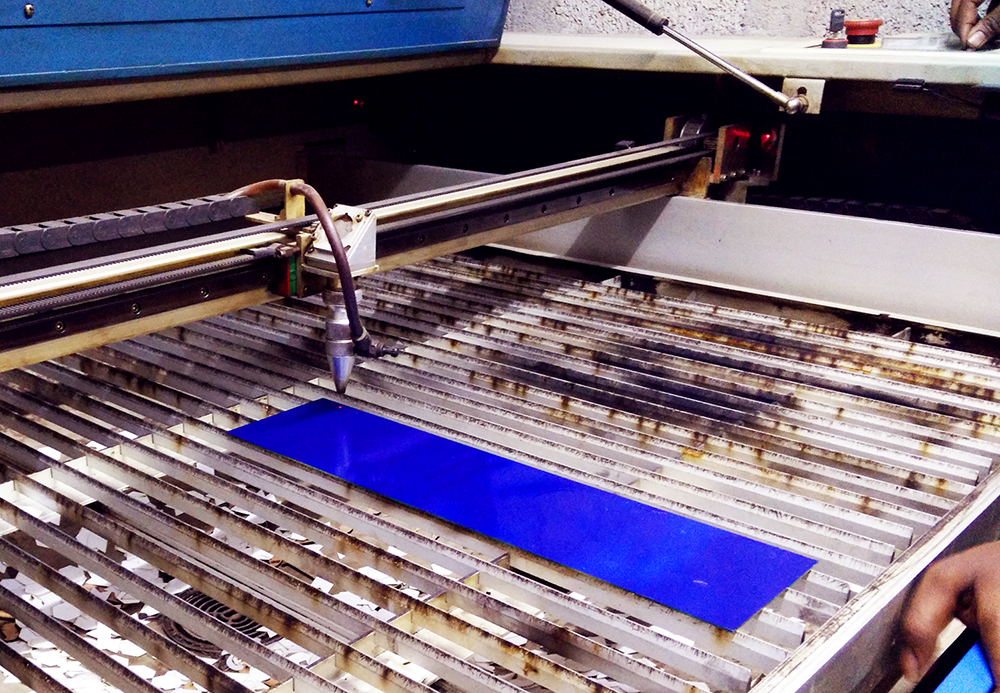
At the (Art)ScienceBLR lab, we tried printing our own biodesign incubator PCB using the laser cutter to etch the tracks.
Photo-resist PCB paints and boards are not easily available here in Bangalore. To make custom PCBs in small numbers we have tried using the clothes iron to transfer toner from glossy print outs to the copper – This is a tiring process and it’s also difficult to print finer tracks.
We followed the following process-
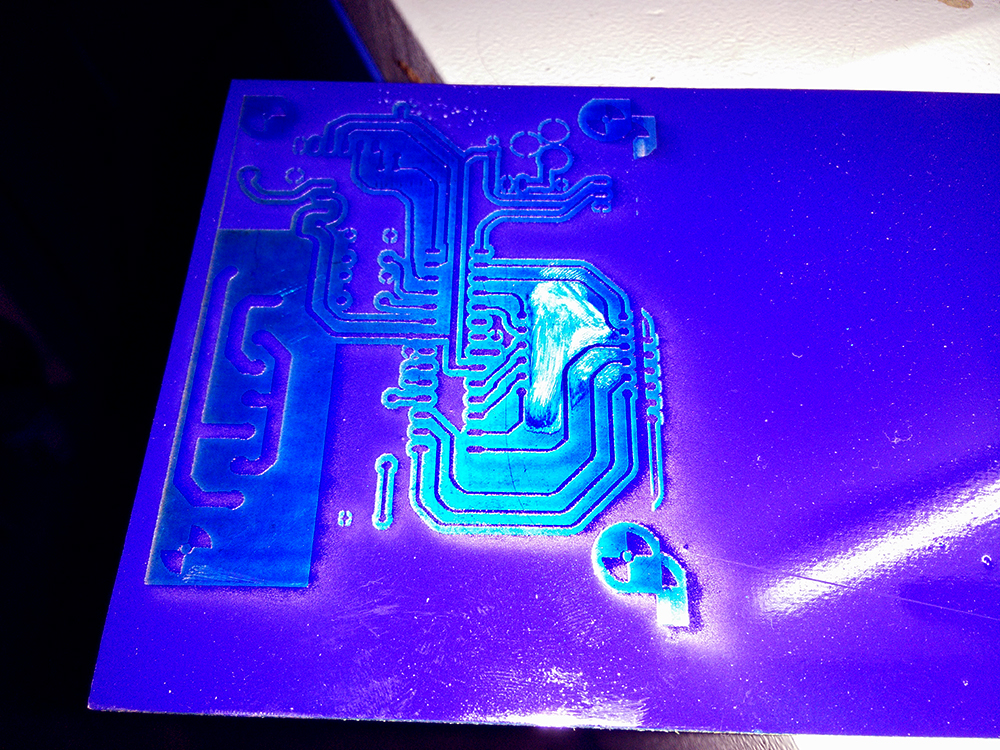
1.Spray paint the copper surface of the PCB. It is better to use acrylic spray paint but enamel spray paint will also do. In the file to be sent to the laser cutter for etching, the part to be etched is black and the tracks to keep is white (Opposite of the iron on PCB pattern)
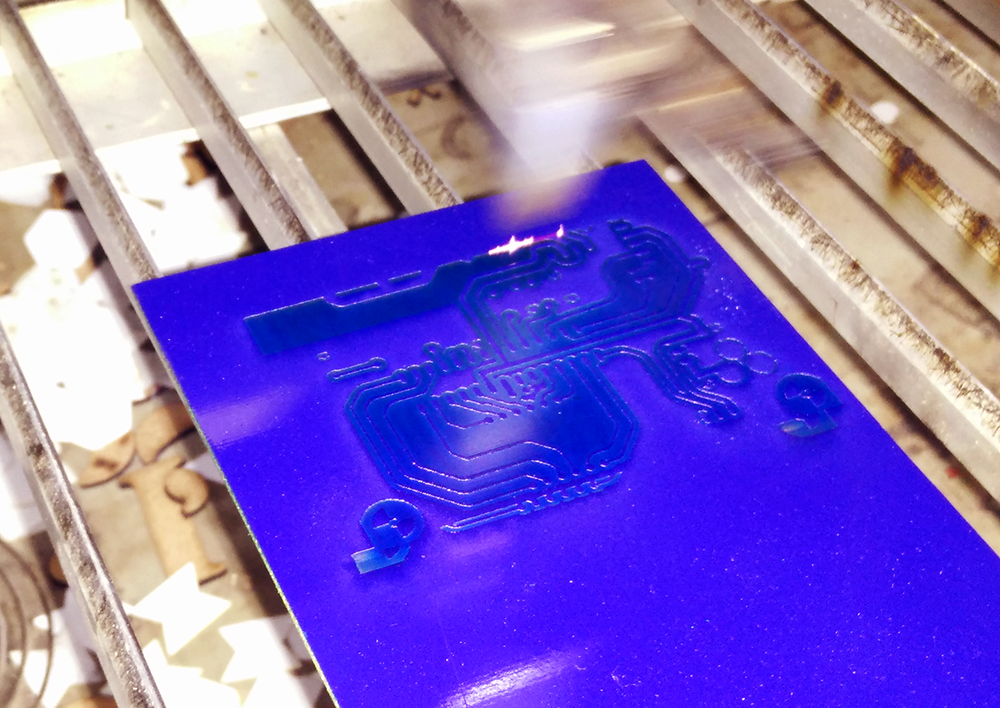
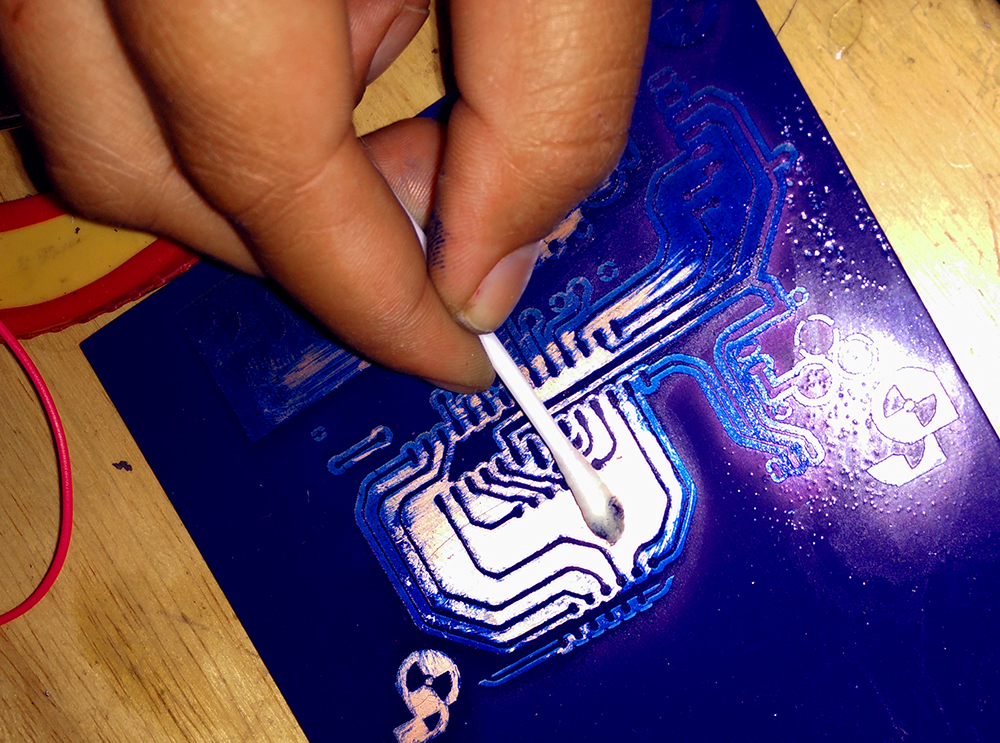
2. The spray paint over the copper to be etched can be easily cleaned with IsoPropyl alcohol.
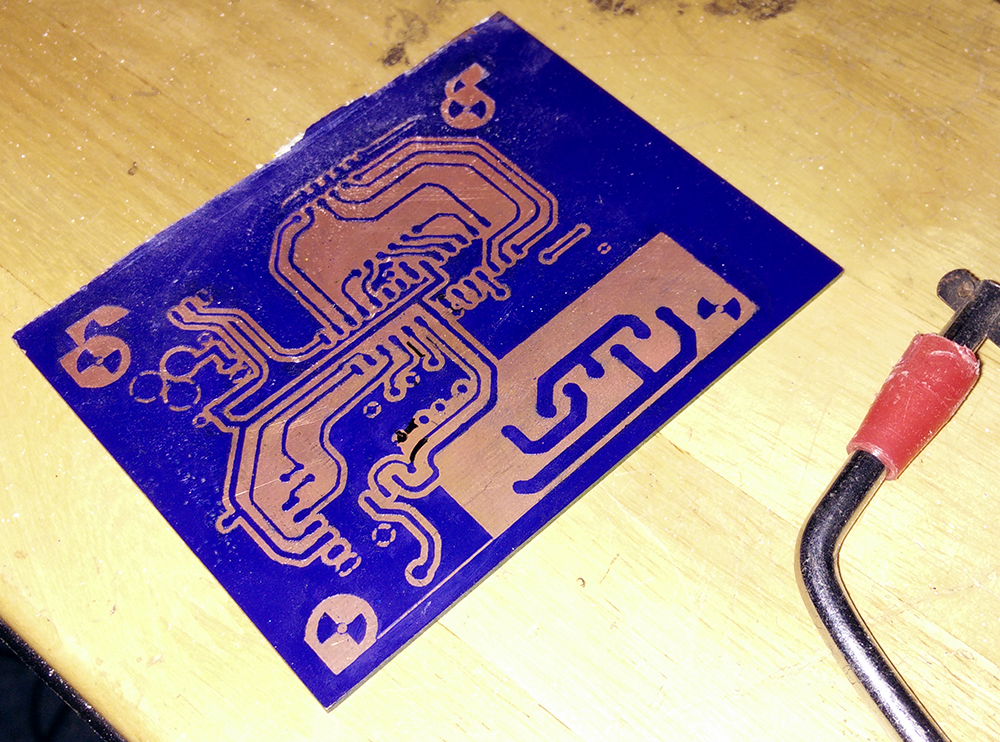
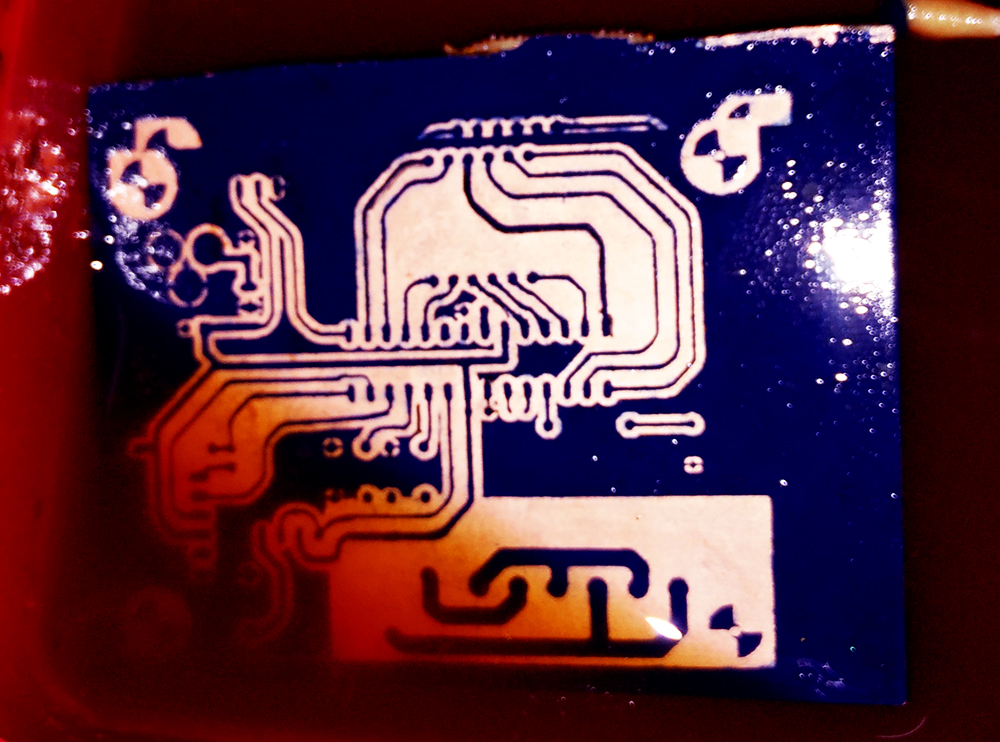
3. The board can now be put into ferric chloride to etch away the copper.

4. The remaining paint comes off in a layer when lightly rubbed with IPA.
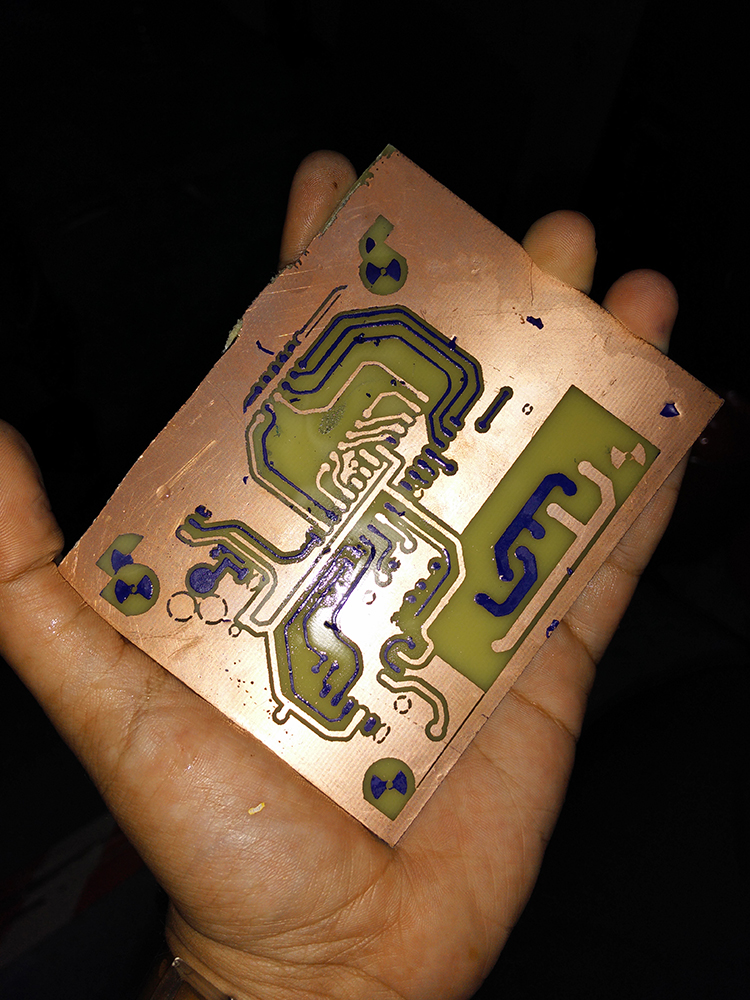
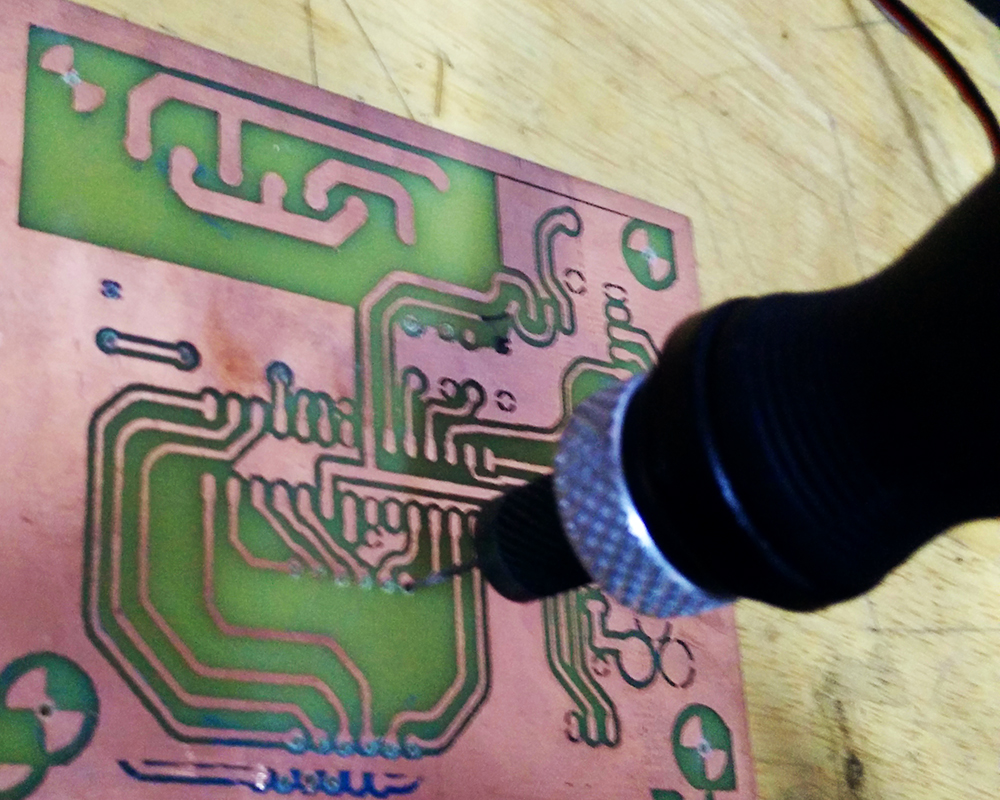
5. After cleaning and drilling the holes for the components, the board is ready for soldering.
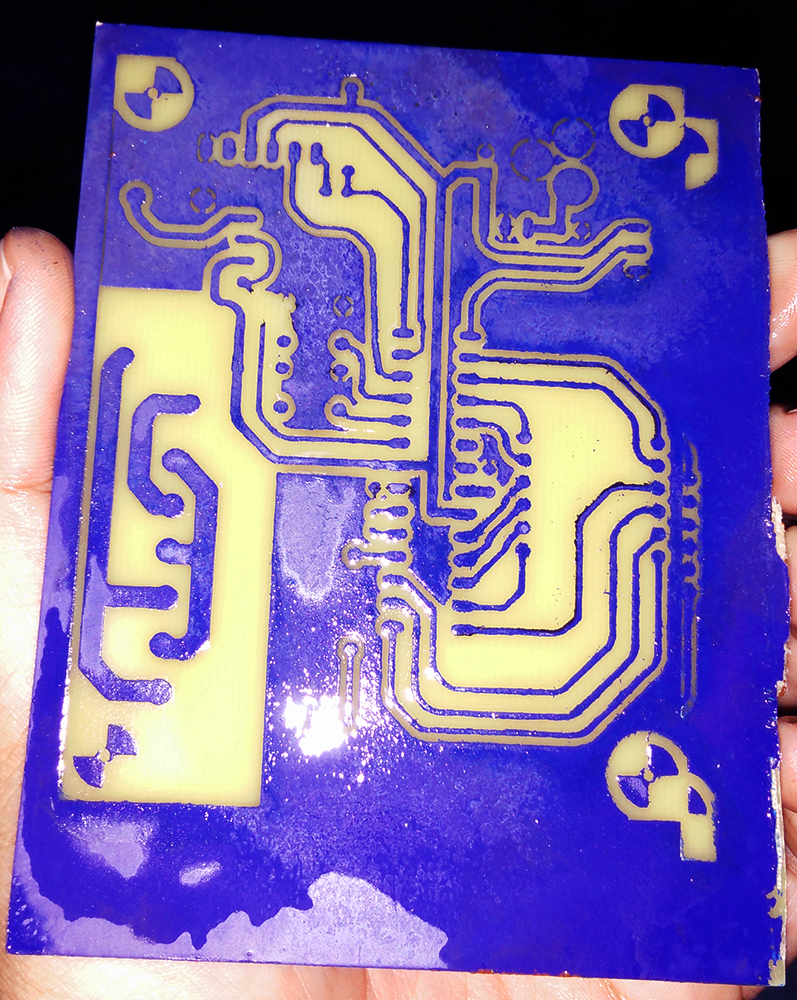
The laser cut PCB was faster to make than iron on method. Using the spray paint saves a lot of time! The scrubbing and cleaning of the copper side needed while preparing the board before the toner transfer can be skipped. Also, the tracks came out much neater!