
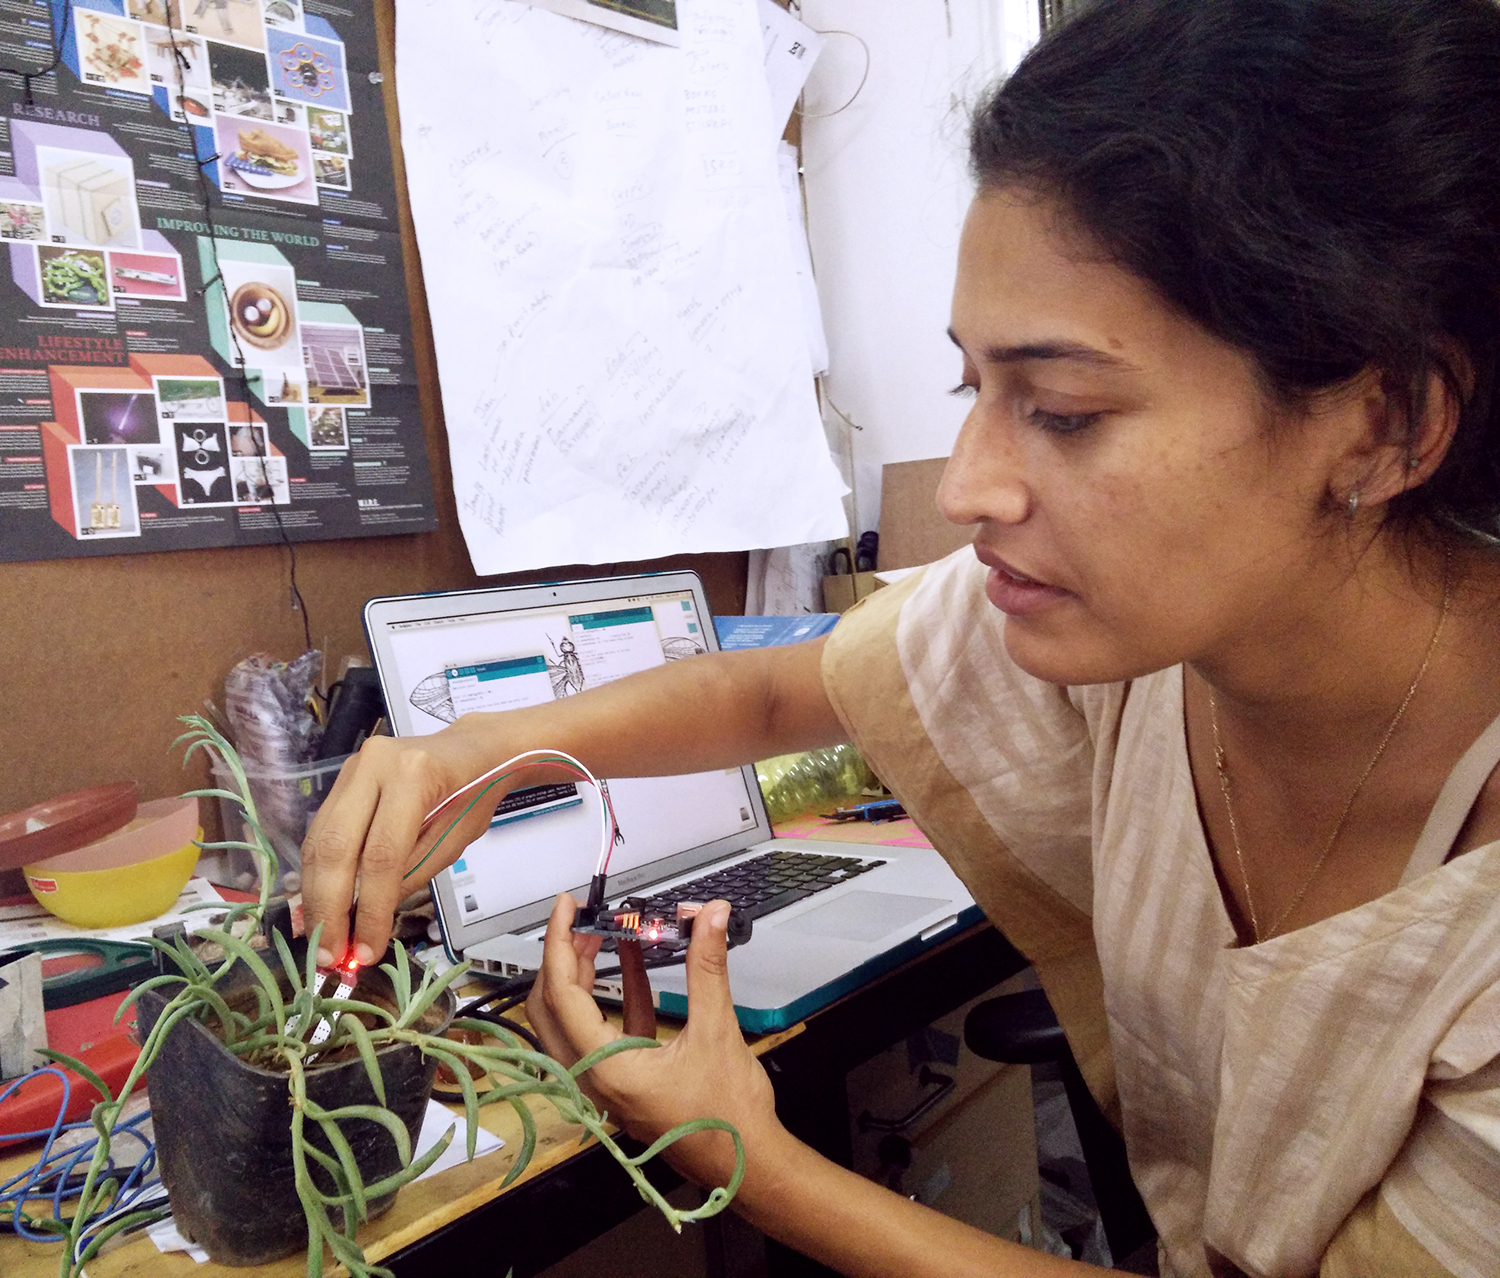
This summer we worked with The Indian Sonic Research Organisation and the Earth Co.Lab . Earth Co Lab is developing a Swamp Song machine using environmental sensors. Swamp songs is a pedagogical experiment with electronics, sound, and ecology – It uses physical computing tools to develop ecological sensors in an effort to rethink how we perceive ecological data.
The machine was based on the Arduino nano which is connected to a nano sensors shield and that is connected to a data logger. The data logger we used was a clone of the adafruit data logger. The sensors shield was an expansion board which gave +5V and GND to each analog and digital input/output. It also interfaces with the UNO/Datalogger as a shield.

The machine measures pH, salinity, temperature, methane, moisture/humidity, turbidity and distance.
1) pH – The pH measurements are still being experimented with. We used a pH probe with the BNC connector and an FET transistor (2n4393/pn4393) to amplify the signal. This was connected to A0 of the sensors shield (nano).
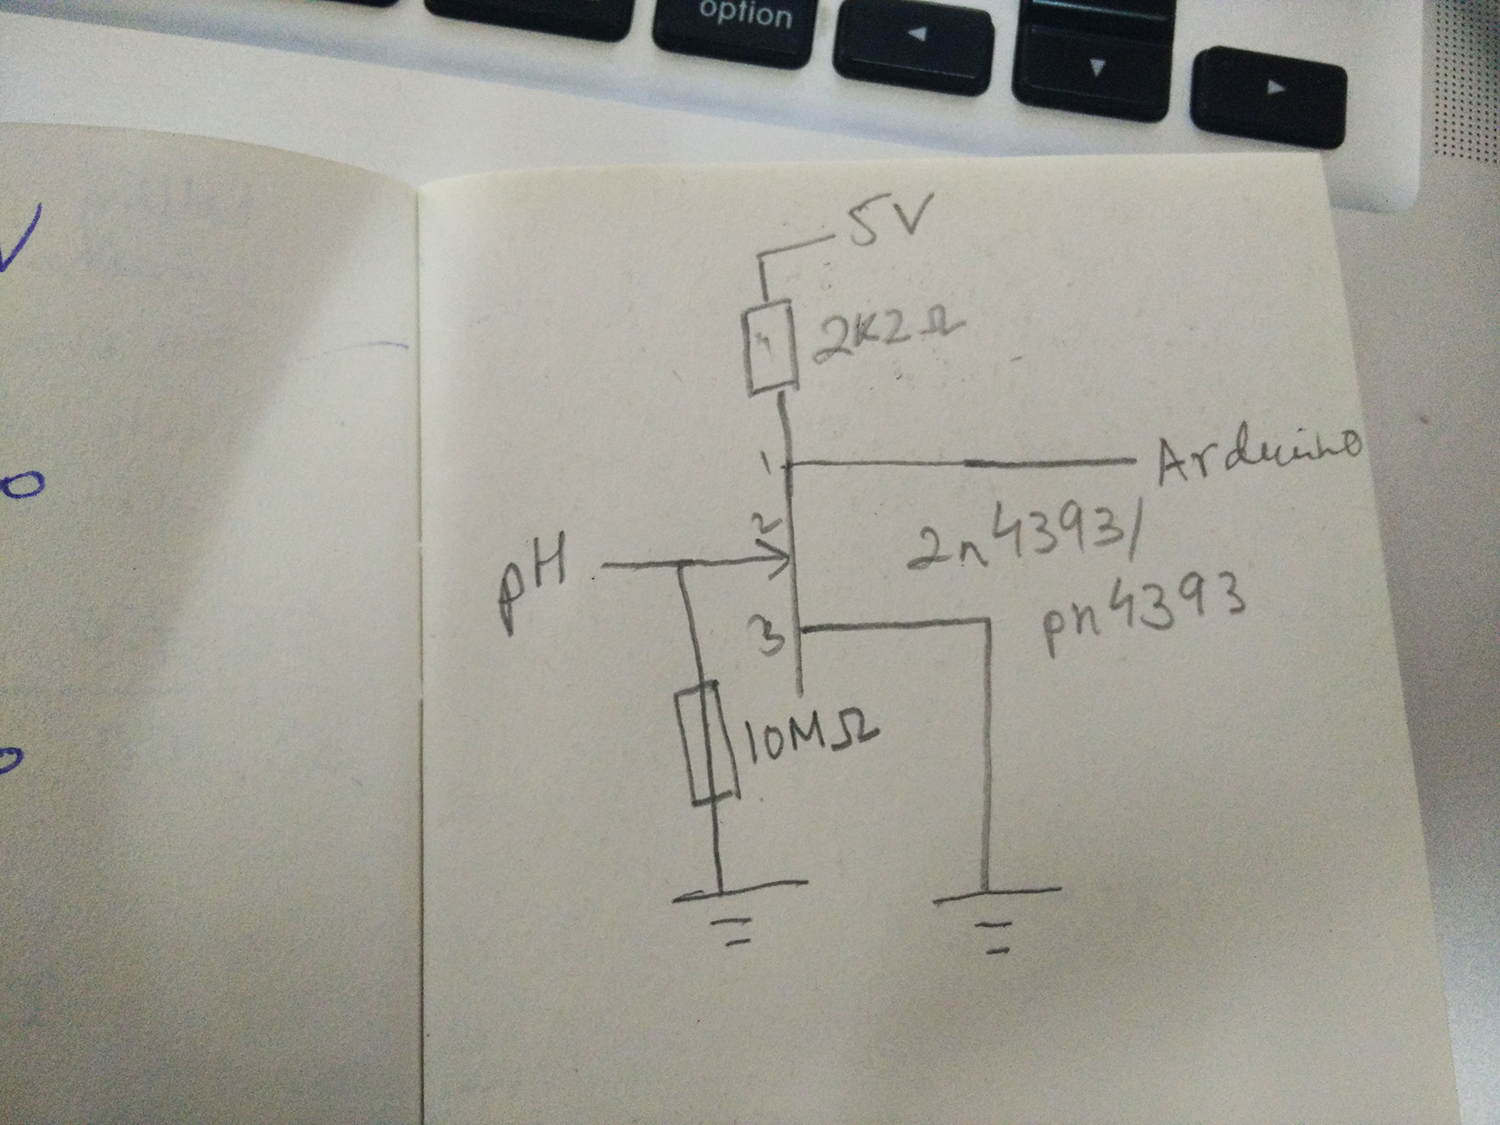
The signal from the central pin of the BNC goes to the FET and the shielding goes to common ground. The pin-outs might change if you use a different FET transistor, so just check the datasheet before connecting.
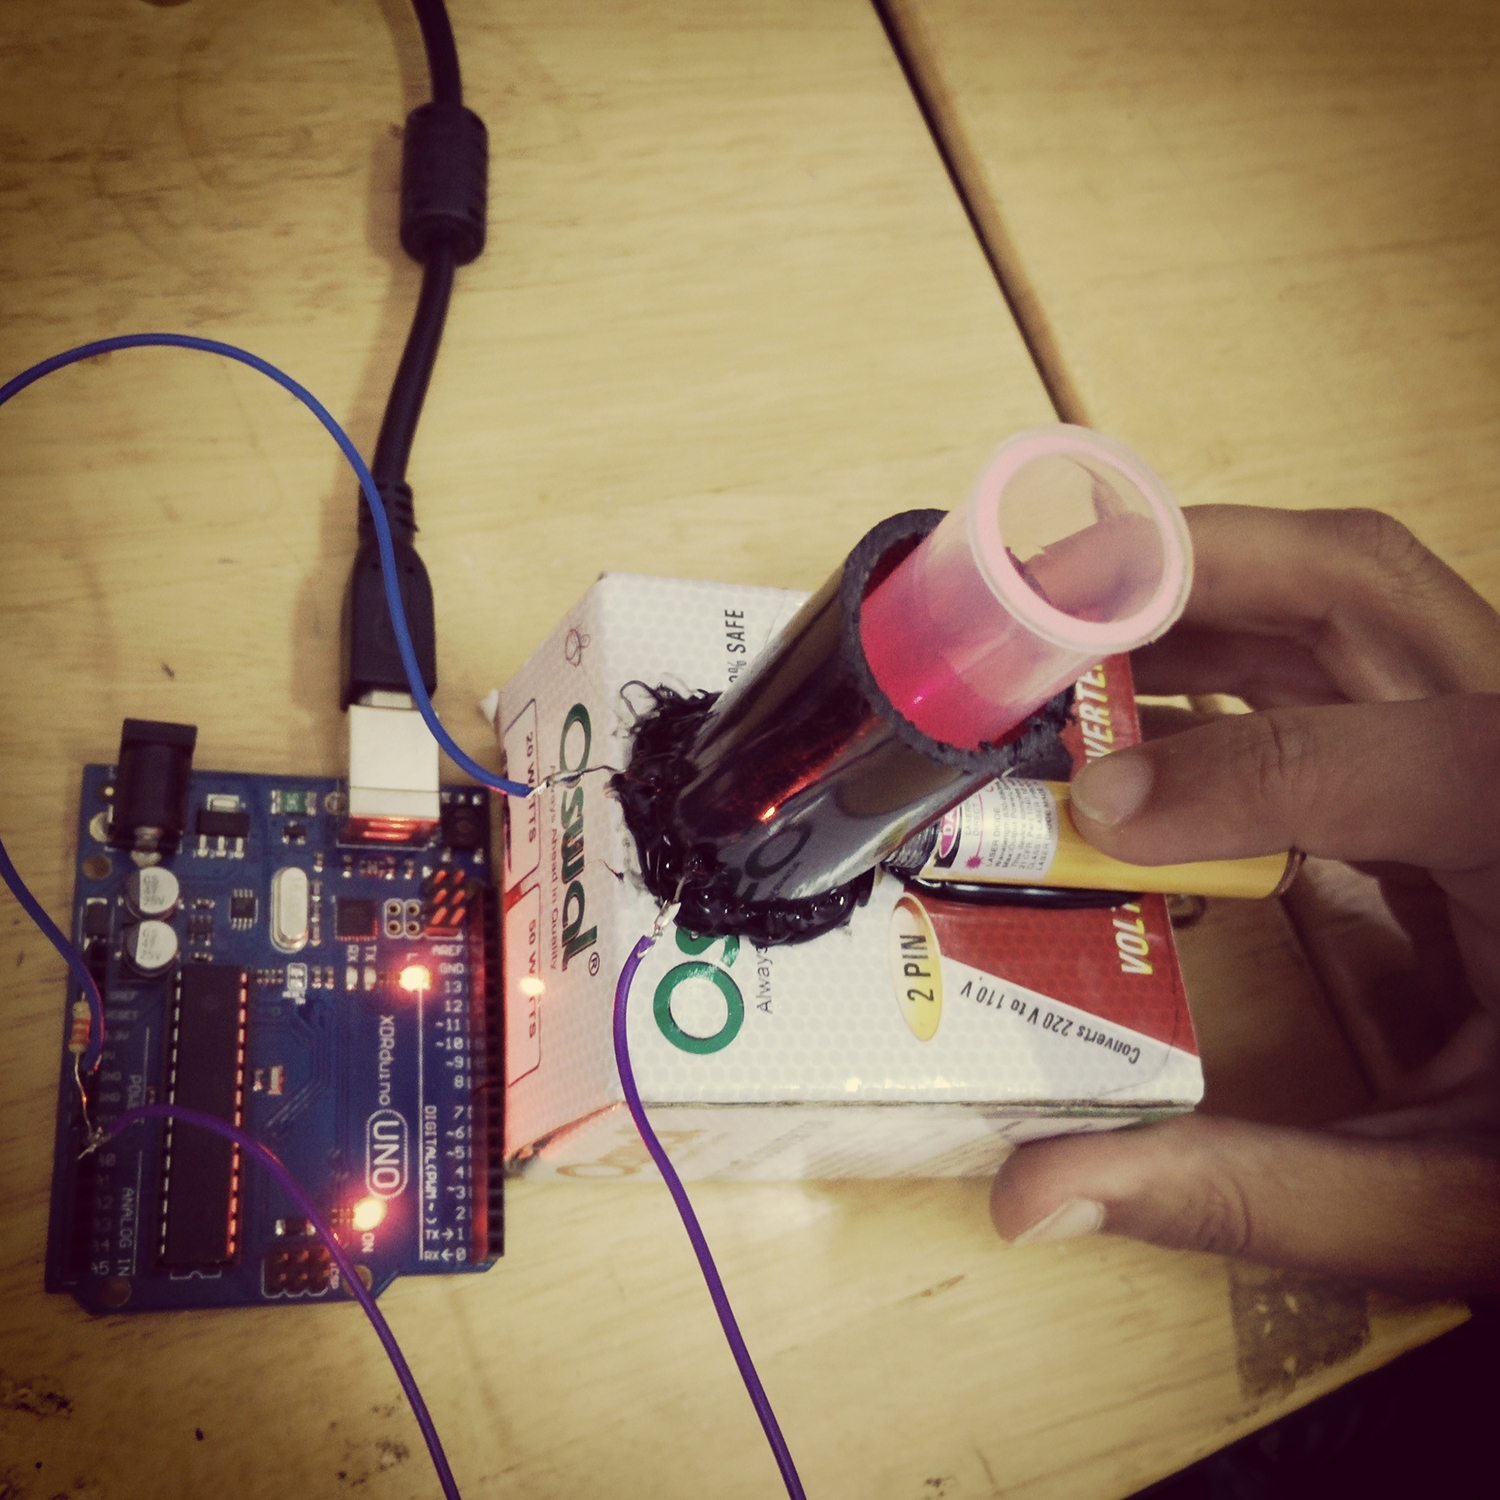
2) Turbidity – We made our own turbidity sensor using a LASER diode and a LDR. A great resource for DIY turbidity meters can be found here. We used a black PVC pipe, slightly bigger than the diameter of a test tube as the housing to ensure darkness. The LDR was placed inside the pipe and a hole drilled opposite to the face of the LDR to allow the laser beam to enter. The wiring is really simple- 33k resistor between +5v to A1, LDR between A1 and GND.
We used the following code –
#define turbidityPin A1
int sensorValue = 0;
int outputValue = 0; // variable for value in percentage

void setup() {
// initialize serial communication at 9600 bits per second:
Serial.begin(9600);
}

void loop() {
// read the input on analog pin 1:
sensorValue = analogRead(turbidityPin);
outputValue = map(sensorValue,0,673, 0, 100); // replace 673 with the sensor value when something opaque is inserted
//Incase the reading is inversely related,use map as - map(sensorValue,0,673, 100, 0)
// print out the value you read:
Serial.print("SensorReading =");
Serial.println(sensorValue);
Serial.print("\t % turbidity = ");
Serial.println(outputValue);
delay(1000); // delay in between reads for stability }
3) Methane – Methane is measured using the MQ4 gas sensor. It is better to power the methane sensor with a separate power supply as it’s heating element consumes more energy and the other sensors get effected. This is connected to A2 ( wiring diagram). To get the readings, upload the following code to the arduino.
int sensorValue;
void setup()
{
 Serial.begin(9600);      // sets the serial port to 9600
}
void loop()
{
 sensorValue = analogRead(2);       // read analog input pin 0
 Serial.println(sensorValue, DEC);  // prints the value read
 delay(100);                        // wait 100ms for next reading
}
The above reading that we get gives us a general trend but doesn’t correspond to the actual ppm concentration. We modified a sketch that we found for the MQ2 general purpose sensor with data found on the MQ4 datasheet to get the concentration of methane in ppm.
#define gasPin A2
#define RL_VALUE (5) //define the load resistance on the board, in kilo ohms
#define RO_CLEAN_AIR_FACTOR (4.5) //RO_CLEAR_AIR_FACTOR=(Sensor resistance in clean air)/RO,

#define CALIBARAION_SAMPLE_TIMES (50) //define how many samples you are going to take in the calibration phase
#define CALIBRATION_SAMPLE_INTERVAL (500) //define the time interal(in milisecond) between each samples in the
//cablibration phase
#define READ_SAMPLE_INTERVAL (50) //define how many samples you are going to take in normal operation
#define READ_SAMPLE_TIMES (5) //define the time interal(in milisecond) between each samples in

//normal operation//which is derived from the chart in datasheet
#define gas_CH4 (0)

float CH4Curve[3] = {2.3,0.45,-1.04};

float Ro = 4.5;

void setup() {
Serial.begin(9600); //UART setup, baudrate = 9600bps
}

void loop() {
Serial.print("Methane:");
Serial.print(MQGetGasPercentage(MQRead(gasPin)/Ro,gas_CH4) );
Serial.print( "ppm" );
Serial.println(" ");
delay(200);
}

float MQResistanceCalculation(int raw_adc)
{
return ( ((float)RL_VALUE*(1023-raw_adc)/raw_adc));
}

float MQCalibration(int gasPin)
{
int i;
float val=0;

for (i=0;i<CALIBARAION_SAMPLE_TIMES;i++) { //take multiple samples
val += MQResistanceCalculation(analogRead(gasPin));
delay(CALIBRATION_SAMPLE_INTERVAL);
}
val = val/CALIBARAION_SAMPLE_TIMES; //calculate the average value

val = val/RO_CLEAN_AIR_FACTOR; //divided by RO_CLEAN_AIR_FACTOR yields the Ro
//according to the chart in the datasheet

return val;
}

float MQRead(int mq_pin)
{
int i;
float rs=0;

for (i=0;i<READ_SAMPLE_TIMES;i++) {
rs += MQResistanceCalculation(analogRead(mq_pin));
delay(READ_SAMPLE_INTERVAL);
}
rs = rs/READ_SAMPLE_TIMES;
return rs;
}

int MQGetGasPercentage(float rs_ro_ratio, int gas_id)
{
if ( gas_id == gas_CH4 ) {
return MQGetPercentage(rs_ro_ratio,CH4Curve);
}

return 0;
}
int MQGetPercentage(float rs_ro_ratio, float *pcurve)
{
return (pow(4.5,( ((log(rs_ro_ratio)-pcurve[1])/pcurve[2]) + pcurve[0])));
}
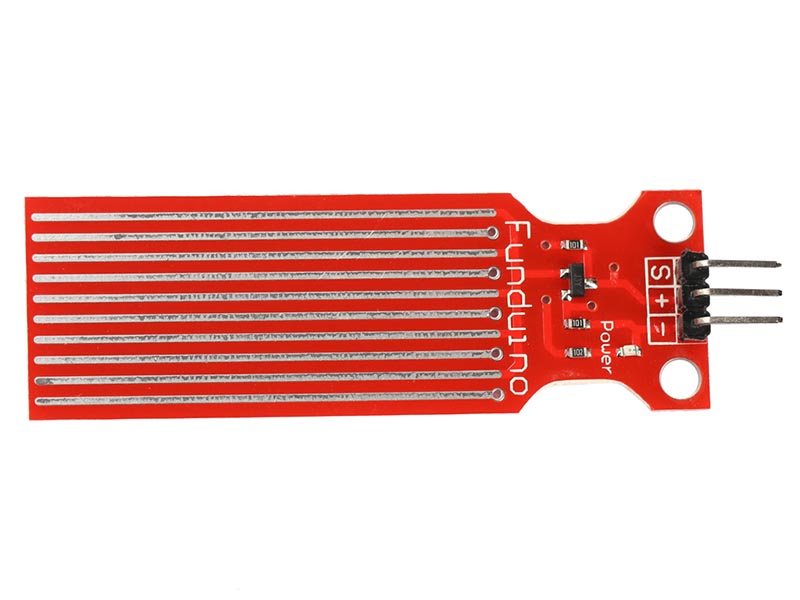
4) Salinity – For measuring salinity, we initially built our own sensor. It is connected to A3 of the nano.
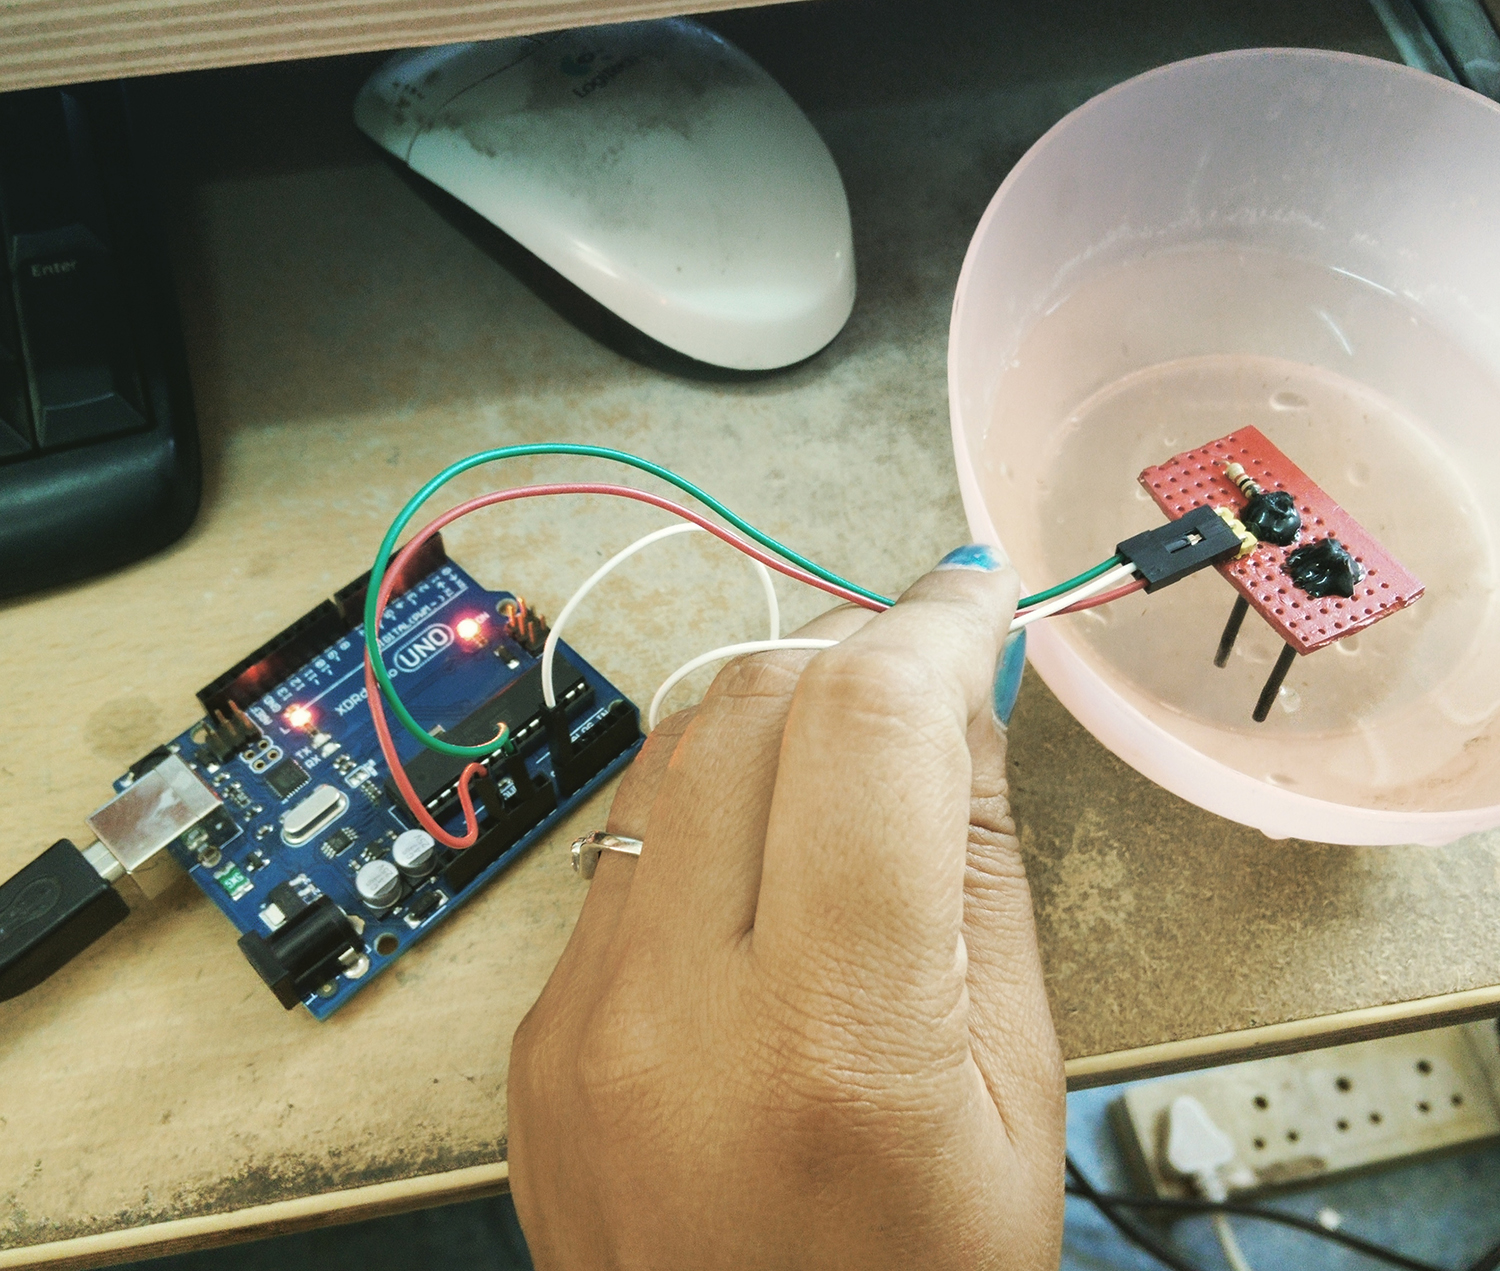
The sensor was built by placing two graphite electrodes (taken from the mechanical pencil) 1cm apart. A 1k resistor was used to form a potential divider and the sensor connected to the Arduino. The graphite electrode was quite fragile and broke often. It was replaced by a water level sensor repurposed to be used as the salinity sensor.
The following sketch that we found was used to measure the salinity.
/*
This is the Arduino sketch for the conductivity probe.
Version 1 - Initial design that report values through to the serial monitor
*/

int inputPin = A3;
const float closedVoltage = 5.00; //assumed value of voltage (replace with vcc)
const float voltageRange = closedVoltage/1024; //Used to map the analog reading to the voltage of the circuit.
const float resistor = 10000.00; //size of resistor on the ground line, 1000 in the case of using with the DIY sensor
int conductReading = 0; //reading from A3 pin
float conductVoltage = 0.00; //calculated voltage from reading
float resistance = 0.00; //calculated resistance of water (ohms)
float area = 0.0002; //area of the all four sides of the electrodes in square meters
float length = 0.01; //distance between the electrodes in meters
float resistivity = 0.0; //resistivity of fluid
float conductivity = 0.00; //calculated conductivity of water (micro-siemens/m)

void setup(){
Serial.begin(9600);
pinMode(inputPin, INPUT);
}

void loop(){
conductReading = analogRead(inputPin);
conductVoltage = conductReading * voltageRange;
resistance = ((closedVoltage * resistor)/conductVoltage) - resistor;
resistivity = resistance * area / length;
conductivity = (1 / resistivity)*1000;
Serial.print(conductReading);
Serial.print(", Conductivity (milliSiemens/m) =");
Serial.println(conductivity);
delay(1000);
}
5) Temperature – Temperature was measured using an LM35. It is connected to A6 on the Nano. A good tutorial can be found here . It is important to waterproof the sensor well before using it in humid conditions/water.
Pin 1 goes to +5V, Pin 2 to A6, Pin 3 to GND
The following sketch was used.
int val;
int tempPin = A6;

void setup()
{
Serial.begin(9600);
}
void loop()
{
val = analogRead(tempPin);
float cel = ( val/1024.0)*500;
float farh = (cel*9)/5 + 32;

Serial.print("TEMPRATURE = ");
Serial.print(cel);
Serial.print("*C");
Serial.println();
delay(1000);

/* uncomment this to get temperature in farenhite
Serial.print("TEMPRATURE = ");
Serial.print(farh);
Serial.print("*F");
Serial.println();
*/
}
6) Soil Moisture – It was measured using a soil moisture sensor.

Soil moisture was represented in percentage. The following sketch was used for it.
#define moisturePin A7
int sensorValue = 0;
int outputValue = 0; // variable for value in percentage

void setup() {
// initialize serial communication at 9600 bits per second:
Serial.begin(9600);
}

void loop() {
// read the input on analog pin 7:
sensorValue = analogRead(moisturePin);
outputValue = map(sensorValue,0,800, 0, 100); // replace 800 with the sensor value when sensor is put into water i.e. 100% moisture

// print out the value you read:
Serial.print("SensorReading =");
Serial.println(sensorValue);
Serial.print("\t % moisture = ");
Serial.println(outputValue);

delay(1000); // delay in between reads for stability
}
7) Distance- We thought that it might be useful to include a distance meter to track the placement of the machine from a known fixed object. We used an ultrasonic sensor for this. It is connected to digital pins 5 and 6. We got the sketch from here .
const int trigPin = 5;
const int echoPin = 6;
void setup() {
// initialize serial communication:
Serial.begin(9600);
}

void loop()
{
// establish variables for duration of the ping,
// and the distance result in inches and centimeters:
long duration, inches, cm;

// The sensor is triggered by a HIGH pulse of 10 or more microseconds.
// Give a short LOW pulse beforehand to ensure a clean HIGH pulse:
pinMode(trigPin, OUTPUT);
digitalWrite(trigPin, LOW);
delayMicroseconds(2);
digitalWrite(trigPin, HIGH);
delayMicroseconds(10);
digitalWrite(trigPin, LOW);

// Read the signal from the sensor: a HIGH pulse whose
// duration is the time (in microseconds) from the sending
// of the ping to the reception of its echo off of an object.
pinMode(echoPin, INPUT);
duration = pulseIn(echoPin, HIGH);

// convert the time into a distance
inches = microsecondsToInches(duration);
cm = microsecondsToCentimeters(duration);

Serial.print(inches);
Serial.print("in, ");
Serial.print(cm);
Serial.print("cm");
Serial.println();

delay(100);
}

long microsecondsToInches(long microseconds)
{
// According to Parallax's datasheet for the PING))), there are
// 73.746 microseconds per inch (i.e. sound travels at 1130 feet per
// second). This gives the distance travelled by the ping, outbound
// and return, so we divide by 2 to get the distance of the obstacle.
// See: http://www.parallax.com/dl/docs/prod/acc/28015-PING-v1.3.pdf
return microseconds / 74 / 2;
}

long microsecondsToCentimeters(long microseconds)
{
// The speed of sound is 340 m/s or 29 microseconds per centimeter.
// The ping travels out and back, so to find the distance of the
// object we take half of the distance travelled.
return microseconds / 29 / 2;
}
After getting all the sensors working, the next step is to move onto the Data Logger. The first step is to set the real time clock on the data logger. We used the tutorial from the Adafruit website.
After setting it up, we uploaded the master all sensors + data logger file to the nano. Below is the code for that.
#include <SD.h>
#include <Wire.h>
#include "RTClib.h"

// A simple data logger for the Arduino analog pins

// how many milliseconds between grabbing data and logging it. 1000 ms is once a second
#define LOG_INTERVAL 1000 // mills between entries (reduce to take more/faster data)

// how many milliseconds before writing the logged data permanently to disk
// set it to the LOG_INTERVAL to write each time (safest)
// set it to 10*LOG_INTERVAL to write all data every 10 datareads, you could lose up to
// the last 10 reads if power is lost but it uses less power and is much faster!
#define SYNC_INTERVAL 1000 // mills between calls to flush() - to write data to the card
uint32_t syncTime = 0; // time of last sync()

#define ECHO_TO_SERIAL 1 // echo data to serial port
#define WAIT_TO_START 0 // Wait for serial input in setup()

// the digital pins that connect to the LEDs
#define redLEDpin 2
#define greenLEDpin 3

// The analog pins that connect to the sensors
//#define phPin A0
#define turbidityPin A1
#define gasPin A2
#define gasDPin D4
#define salinityPin A3
#define tempPin A6
#define moisturePin A7
//#define trigPin 5 // range ultrasound added below as const int
//#define echoPin 6 //range ultrasound

#define RL_VALUE (5) //define the load resistance on the board, in kilo ohms
#define RO_CLEAN_AIR_FACTOR (4.5) //RO_CLEAR_AIR_FACTOR=(Sensor resistance in clean air)/RO,
#define CALIBARAION_SAMPLE_TIMES (50) //define how many samples you are going to take in the calibration phase
#define CALIBRATION_SAMPLE_INTERVAL (500) //define the time interal(in milisecond) between each samples in the //cablibration phase
#define READ_SAMPLE_INTERVAL (50) //define how many samples you are going to take in normal operation
#define READ_SAMPLE_TIMES (5) //define the time interal(in milisecond) between each samples in
#define gas_CH4 (0)

#define BANDGAPREF 14 // data logger stuff:special indicator that we want to measure the bandgap
#define aref_voltage 5 // we tie 5V to ARef and measure it with a multimeter!
#define bandgap_voltage 1.1 // this is not super guaranteed but its not -too- off

float CH4Curve[3] = {2.3,0.45,-1.04};
float Ro = 4.5;

int phReading = 0;
int phValue = 0;
int turbidityReading = 0;
int turbidityValue = 0;
//int gasReading = 0;
//int gasValue = 0;
//int salinityReading = 0;
//int salinityValue = 0;
int tempReading = 0;
int tempValue = 0;
int moistureReading = 0;
int moistureValue = 0;

//int microsecondsToCentimeters = 0; // for range ultrasound

const int trigPin = 5; //range ultrasound
const int echoPin = 6;

const float salclosedVoltage = 5.00; //Salinity stuff; assumed value of voltage (replace with vcc)
const float salvoltageRange = salclosedVoltage/1024; //Used to map the analog reading to the voltage of the circuit.
const float salresistor = 10000.00; //size of resistor on the ground line

int salconductReading = 0; //reading from A3 pin

float salconductVoltage = 0.00; //calculated voltage from reading
float salresistance = 0.00; //calculated resistance of water (ohms)
float salarea = 0.0002; //area of the all four sides of the electrodes in square meters
float length = 0.01; //distance between the electrodes in meters
float salresistivity = 0.0; //resistivity of fluid
float salconductivity = 0.00; //calculated conductivity of water (micro-siemens/m)

RTC_DS1307 RTC; // DATA LOGGER STUFF : define the Real Time Clock object

// for the data logging shield, we use digital pin 10 for the SD cs line
const int chipSelect = 10;

// the logging file
File logfile;

void error(char *str)
{
Serial.print("error: ");
Serial.println(str);

// red LED indicates error
digitalWrite(redLEDpin, HIGH);

while(1);
}

void setup(void)
{
Serial.begin (115200);
analogReference(INTERNAL);
Serial.println();

// use debugging LEDs
pinMode(redLEDpin, OUTPUT);
pinMode(greenLEDpin, OUTPUT);

#if WAIT_TO_START
Serial.println("Type any character to start");
while (!Serial.available());
#endif //WAIT_TO_START

// initialize the SD card
Serial.print("Initializing SD card...");
// make sure that the default chip select pin is set to
// output, even if you don't use it:
pinMode(10, OUTPUT);

// see if the card is present and can be initialized:
if (!SD.begin(chipSelect)) {
error("Card failed, or not present");
}
Serial.println("card initialized.");

// create a new file
char filename[] = "LOGGER00.CSV";
for (uint8_t i = 0; i < 100; i++) {
filename[6] = i/10 + '0';
filename[7] = i%10 + '0';
if (! SD.exists(filename)) {
// only open a new file if it doesn't exist
logfile = SD.open(filename, FILE_WRITE);
break; // leave the loop!
}
}

if (! logfile) {
error("couldnt create file");
}

Serial.print("Logging to: ");
Serial.println(filename);

// connect to RTC
Wire.begin();
if (!RTC.begin()) {
logfile.println("RTC failed");
#if ECHO_TO_SERIAL
Serial.println("RTC failed");
#endif //ECHO_TO_SERIAL
}

logfile.println("millis,stamp,datetime,turbidity%,Methane_ppm,Saln_mS/m,temp_C,temp_F,moisture%,range_in,range_cm,vcc");
#if ECHO_TO_SERIAL
Serial.println("millis,stamp,datetime,turbidity%,Methane_ppm,Saln_mS/m,temp_C,temp_F,moisture%,range_in,range_cm,vcc");
#endif //ECHO_TO_SERIAL

// If you want to set the aref to something other than 5v
analogReference(EXTERNAL);
}

void loop(void)
{
DateTime now; //DATA LOGGER STUFF

// delay for the amount of time we want between readings
delay((LOG_INTERVAL -1) - (millis() % LOG_INTERVAL));

digitalWrite(greenLEDpin, HIGH);

// log milliseconds since starting
uint32_t m = millis();
logfile.print(m); // milliseconds since start
logfile.print(", ");
#if ECHO_TO_SERIAL
Serial.print(m); // milliseconds since start
Serial.print(", ");
#endif

// fetch the time
now = RTC.now();
// log time
logfile.print(now.unixtime()); // seconds since 1/1/1970
logfile.print(", ");
logfile.print('"');
logfile.print(now.year(), DEC);
logfile.print("/");
logfile.print(now.month(), DEC);
logfile.print("/");
logfile.print(now.day(), DEC);
logfile.print(" ");
logfile.print(now.hour(), DEC);
logfile.print(":");
logfile.print(now.minute(), DEC);
logfile.print(":");
logfile.print(now.second(), DEC);
logfile.print('"');
#if ECHO_TO_SERIAL
Serial.print(now.unixtime()); // seconds since 1/1/1970
Serial.print(", ");
Serial.print('"');
Serial.print(now.year(), DEC);
Serial.print("/");
Serial.print(now.month(), DEC);
Serial.print("/");
Serial.print(now.day(), DEC);
Serial.print(" ");
Serial.print(now.hour(), DEC);
Serial.print(":");
Serial.print(now.minute(), DEC);
Serial.print(":");
Serial.print(now.second(), DEC);
Serial.print('"');
#endif //ECHO_TO_SERIAL

// startting sensor codes
turbidityReading = analogRead(turbidityPin);
turbidityValue = map(turbidityReading, 20, 960, 0, 100);

salconductReading = analogRead(salinityPin); //salConductivity
salconductVoltage = salconductReading * salvoltageRange;
salresistance = ((salclosedVoltage * salresistor)/salconductVoltage) - salresistor;
salresistivity = salresistance * salarea / length;
salconductivity = (1 / salresistivity)*1000;

tempValue = analogRead(tempPin); //temperature problems
float mv = ( tempValue/1024.0)*5000;
float cel = (mv/10)-10; //CORRECTION OF -10
float farh = (cel*9)/5 + 32;

moistureReading = analogRead(moisturePin); //soil moisture
moistureValue = map(moistureReading,1023,104,0,100);

long duration, inches, cm; //range ultrasound
pinMode(trigPin, OUTPUT);
digitalWrite(trigPin, LOW);
delayMicroseconds(2);
digitalWrite(trigPin, HIGH);
delayMicroseconds(10);
digitalWrite(trigPin, LOW); // Read the signal from the sensor: a HIGH pulse whose
// duration is the time (in microseconds) from the sending
// of the ping to the reception of its echo off of an objec
pinMode(echoPin, INPUT);
duration = pulseIn(echoPin, HIGH);
// convert the time into a distance
inches = microsecondsToInches(duration);
cm = microsecondsToCentimeters(duration);
logfile.print(", ");
logfile.print(turbidityValue);
logfile.print(", ");
logfile.print(MQGetGasPercentage(MQRead(gasPin)/Ro,gas_CH4));
logfile.print(", ");
logfile.print(salconductivity);
logfile.print(", ");
logfile.print(cel);
logfile.print(", ");
logfile.print(farh);
logfile.print(", ");
logfile.print(moistureValue);
logfile.print(", ");
logfile.print(inches);
logfile.print(", ");
logfile.print(cm);
logfile.print(", ");

#if ECHO_TO_SERIAL // DONT TOUCH DL
Serial.print(", ");
Serial.print("turbidity%=");
Serial.println(turbidityValue);
Serial.print(", ");
Serial.print("Methane:"); //gas
Serial.print(MQGetGasPercentage(MQRead(gasPin)/Ro,gas_CH4) );
Serial.print( "ppm" );
Serial.print(", ");
Serial.print("Conductivity (milliSiemens/m) =");
Serial.println(salconductivity);
Serial.print(", ");
Serial.print("TEMPRATURE_c = ");
Serial.print(cel);
Serial.print("*C");
Serial.print(", ");
Serial.print("TEMPRATURE_f = ");
Serial.print(farh);
Serial.print("*F");
Serial.print("% moisture = ");
Serial.print(moistureValue);
Serial.println();
Serial.print("distance:");
Serial.print(inches);
Serial.print("in, ");
Serial.print(cm);
Serial.print("cm");
Serial.println();
#endif //ECHO_TO_SERIAL //DONT TOUCH DL

// Log the estimated 'VCC' voltage by measuring the internal 1.1v ref
analogRead(BANDGAPREF);
delay(4000);

int refReading = analogRead(BANDGAPREF);
float supplyvoltage = (bandgap_voltage * 1024) / refReading;

logfile.print(", ");
logfile.print(supplyvoltage);
#if ECHO_TO_SERIAL
Serial.print(", ");
Serial.print(supplyvoltage);
#endif // ECHO_TO_SERIAL

logfile.println();
#if ECHO_TO_SERIAL
Serial.println();
#endif // ECHO_TO_SERIAL

digitalWrite(greenLEDpin, LOW);

// Now we write data to disk! Don't sync too often - requires 2048 bytes of I/O to SD card
// which uses a bunch of power and takes time
if ((millis() - syncTime) < SYNC_INTERVAL) return;
syncTime = millis();

// blink LED to show we are syncing data to the card & updating FAT!
digitalWrite(redLEDpin, HIGH);
logfile.flush();
digitalWrite(redLEDpin, LOW);

}

float MQResistanceCalculation(int raw_adc) //gas sensor details
{
return ( ((float)RL_VALUE*(1023-raw_adc)/raw_adc));
}

float MQCalibration(int gasPin)
{
int i;
float val=0;

for (i=0;i<CALIBARAION_SAMPLE_TIMES;i++) { //take multiple samples
val += MQResistanceCalculation(analogRead(gasPin));
delay(CALIBRATION_SAMPLE_INTERVAL);
}
val = val/CALIBARAION_SAMPLE_TIMES; //calculate the average value

val = val/RO_CLEAN_AIR_FACTOR; //divided by RO_CLEAN_AIR_FACTOR yields the Ro
//according to the chart in the datasheet

return val;
}

float MQRead(int mq_pin)
{
int i;
float rs=0;

for (i=0;i<READ_SAMPLE_TIMES;i++) {
rs += MQResistanceCalculation(analogRead(mq_pin));
delay(READ_SAMPLE_INTERVAL);
}
rs = rs/READ_SAMPLE_TIMES;
return rs;
}

int MQGetGasPercentage(float rs_ro_ratio, int gas_id)
{
if ( gas_id == gas_CH4 ) {
return MQGetPercentage(rs_ro_ratio,CH4Curve);
}

return 0;
}
int MQGetPercentage(float rs_ro_ratio, float *pcurve)
{
return (pow(4.5,( ((log(rs_ro_ratio)-pcurve[1])/pcurve[2]) + pcurve[0])));
}

long microsecondsToInches(long microseconds) // calculations for range ultrasound
{
// According to Parallax's datasheet for the PING))), there are
// 73.746 microseconds per inch (i.e. sound travels at 1130 feet per
// second). This gives the distance travelled by the ping, outbound
// and return, so we divide by 2 to get the distance of the obstacle.
// See: http://www.parallax.com/dl/docs/prod/acc/28015-PING-v1.3.pdf
return microseconds / 74 / 2;
}

long microsecondsToCentimeters(long microseconds)
{
// The speed of sound is 340 m/s or 29 microseconds per centimeter.
// The ping travels out and back, so to find the distance of the
// object we take half of the distance travelled.
return microseconds / 29 / 2;
}
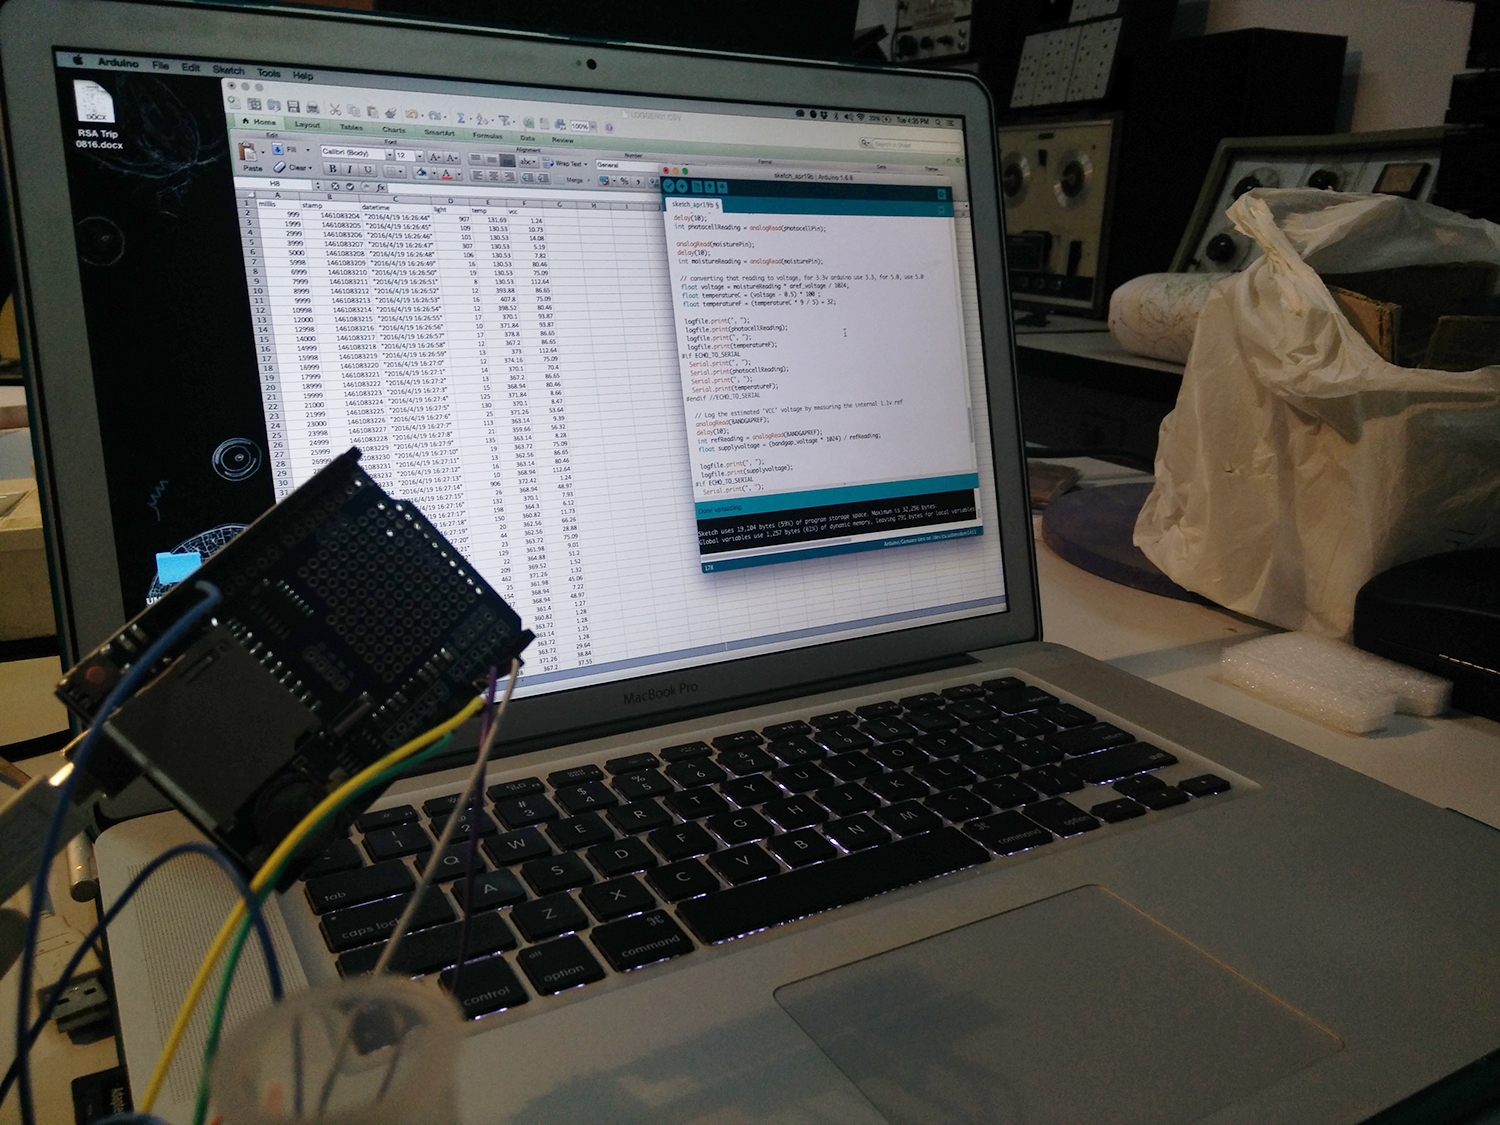
The file that we get is in CSV format and can be directly imported into excel, pd or other softwares.
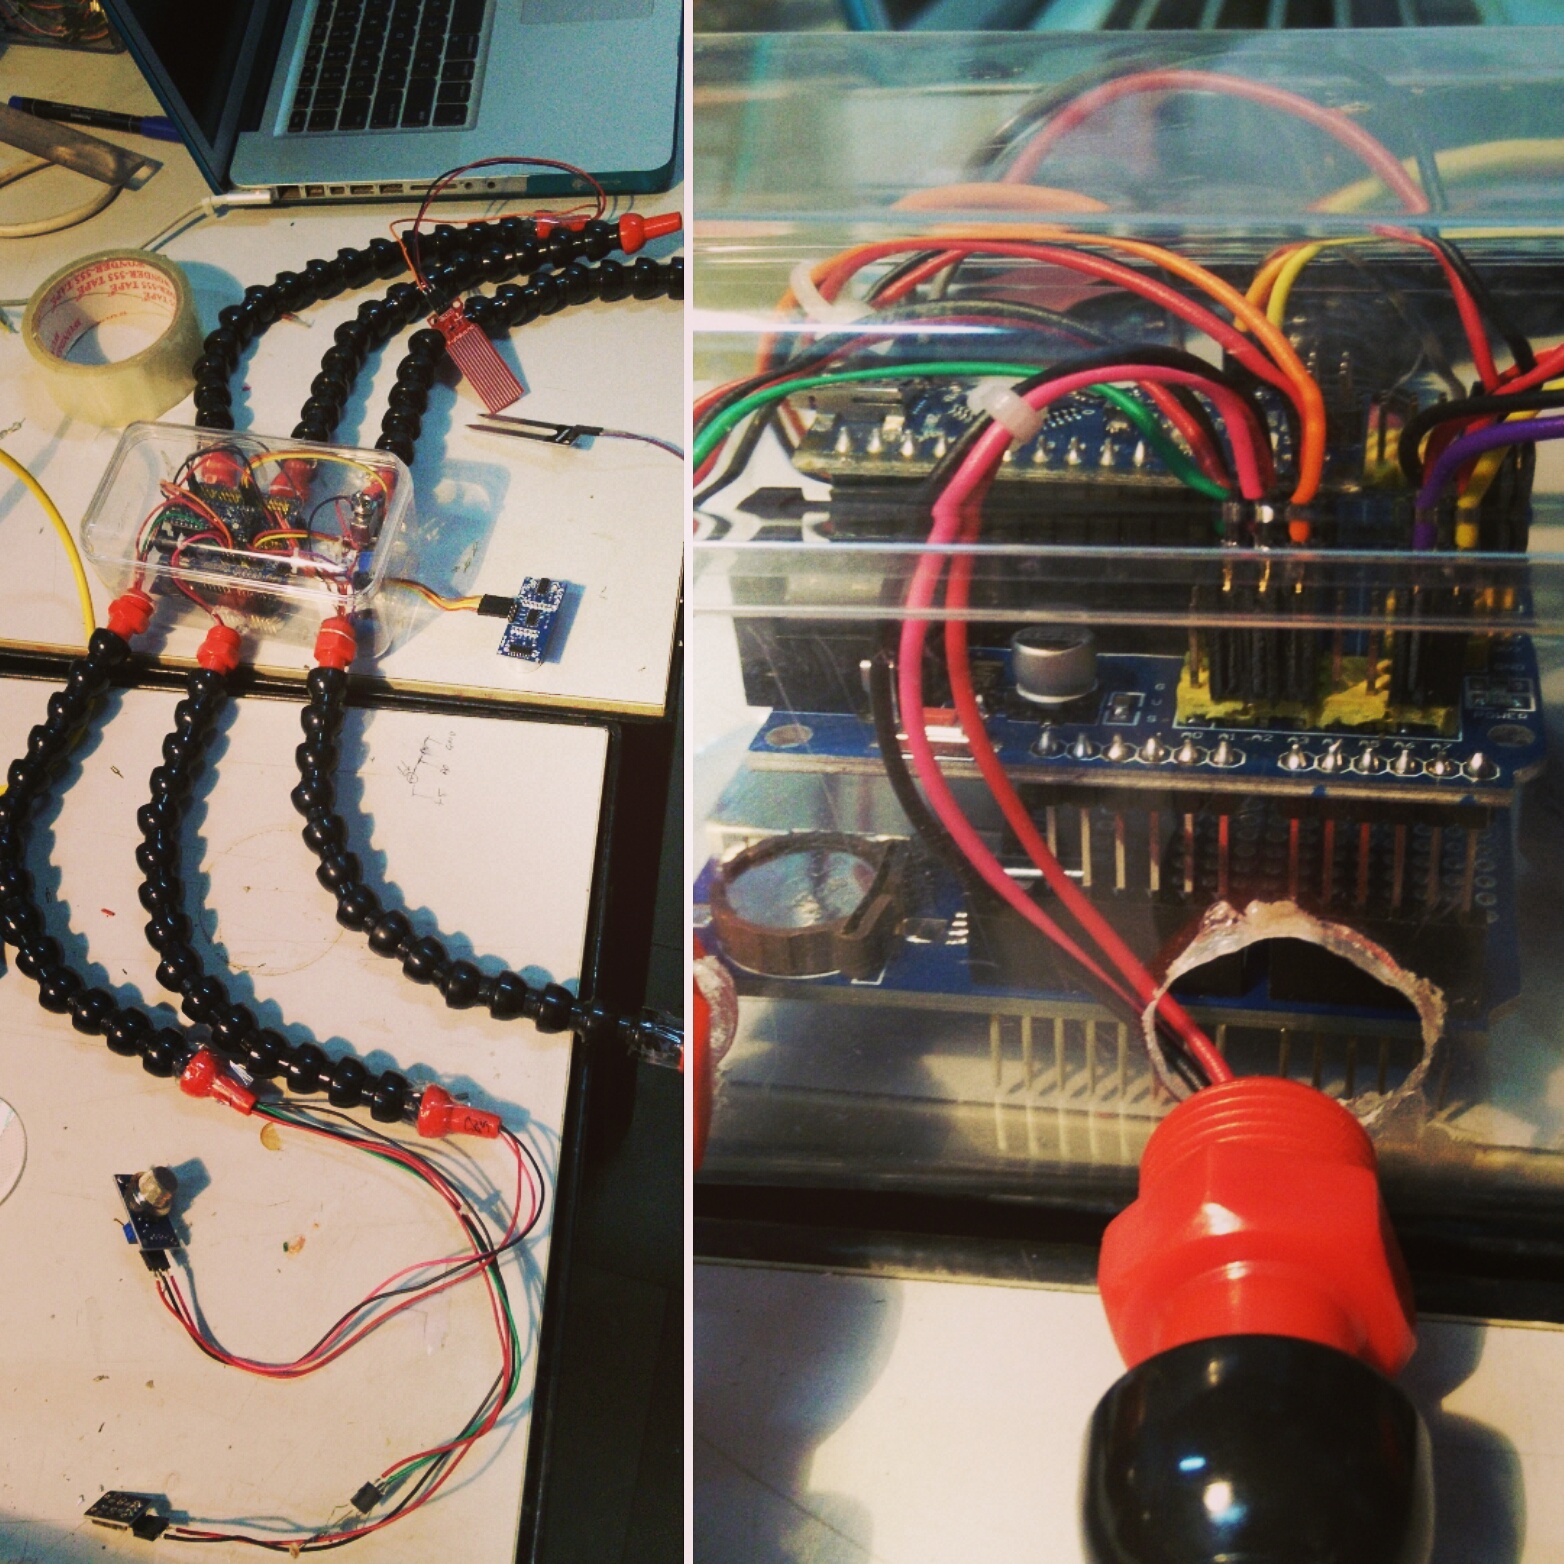
We used a plastic chocolate box and coolant pipes to make the structure and housing.